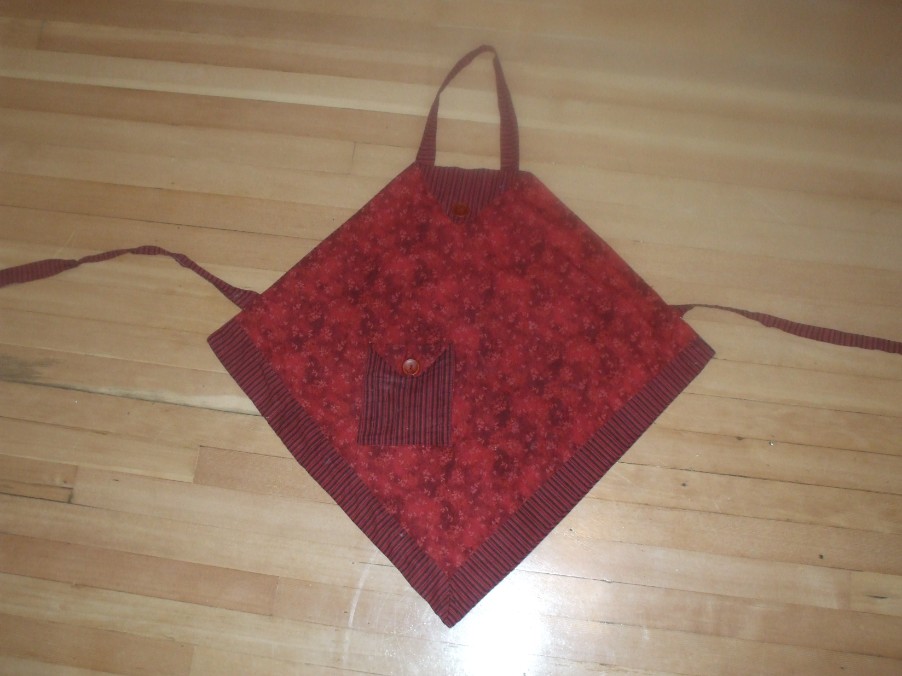
Apron
I made this adorale apron just before Christmas. It is so cute and a little funky that I wanted to share it with all of you. The best thing is you can totally made it your own and do whatever types of fabric you want!
Supplies:
Rotary Cutters/scissors
thread
1 yard print fabric, cotton would be best (ex: vertical)
1 yard print fabric, cotton would be best (ex: polka dot, flower, you can even do plain)
2 buttons
Direction:
Front of apron (first piece of fabric)
On the fabric you have chosen as the front piece of the apron cut out a square so it is 23" on the top and 23" on the side. Will make a perfect square.
Cut out the pocket, template is attached.
Coordinating fabric
On the coordinating fabric cut a square again for the back of the apron, this time 25 1/4" on the top and 25 1/4" on the side. Will make a perfect square.
Cut a strip for the bottom trim with the coordinating fabric make it 2 1/2" on the side and 26" on the top.
Cut a strip for the neck strap from the coordinating fabric, make it 3" on the side and 23-25" on the top. The measurement on the top will be dependent on how long you want the neck strap to be.
Cut two strips for the waist ties from the coordinating fabric, making them 3" on the side and however long you need to go around the back.
Cut out the pocket, template is attached.
Note: If there is a one-way vertical print on the fabric like cows, make sure the head of the cow is down on the back side and pocket.
Note: If there is a one-way vertical print on the fabric like cows, make sure the head of the cow is up on the front side and pocket.
1. With right sides together, line up one of the bottom trims to the apron front. Repeat for other bottom trim. Fold the tail of the second trim under and press the fold making a crease mark. Pin the tails in place. With right sides together, fold the apron panel in half and sew the seam on the trims. Cut off excess and press open.
2. Put the right sides of the pocket together and sew around the edges giving yourself a 1/4" seam allowance, leaving yourself an opening to turn it. Place pocket on apron front and topstitch into place.
3. With right sides together line the apron front to the apron back. Again, with a 1/4" seam allowance sew round apron leaving an opening again to turn right side out and press. You may want to trim the corners so they aren't so bulky in your seam.
4. Put the right sides together of the neck strap and ties and sew together. You can cut the ties on an angle to give a little more flare if you want for tying. Turn right side out and press.
5. Check your neck strap length by pinning onto apron, adjust as necessary and sew into place. You will need to fold the flap of the top of your apron to the front about 4 1/2" from the top. You will want to fold the raw ends of the neck strap under and then topstitch into place.
6. Put the raw edges of one of the ties into the opening on the side of the apron and stitch into place closing the opening as you go. Fold the apron in half and mark where your other tie will go. Remove a few stitches from the area and insert the tie. Stitch into place closing the opening as you go.
7. Fold the flap of the pocket down and press. Sew a button onto the flap being careful not to sew all the way through the apron, this way you can have a useable pocket.